In order to accept credit cards on your site and be minimally PCI compliant you must have an SSL certificate and use HTTPS on all pages that collect credit card information. HTTPS provides authentication for your web site and associated web server, which protects against man-in-the-middle attacks. Additionally, it provides bidirectional encryption of communications between a customer's browser and your server, which protects against eavesdropping and tampering with and/or forging the contents of the communication.
In this article we'll cover the steps you'll need to go through in order to ensure your site is secure. This article may also be helpful: http://www.wpbeginner.com/wp-tutorials/how-to-add-ssl-and-https-in-wordpress/.
Purchase and Install a SSL Certificate
There are a number of companies you can purchase SSL certificates from including GoDaddy, VeriSign and GeoTrust to name few. Once you've purchased an SSL certificate, you'll need to work with your hosting provider to get it set up on your server.
Verify Your SSL Certificate is Installed Correctly
Once you've worked with your hosting provider to get the SSL certificate installed, you can verify that everything is set up correctly by using this SSL Checker.
Check WordPress SSL Settings
If you're going to utilize the HTTPS plugin we recommend below then you'll want to make sure that WordPress isn't forcing SSL. Do this by going to the wp-config.php file and checking if FORCE_SSL_ADMIN is being defined there and if so, make sure it's set to false. Here are detailed instructions of working with the force SSL setting.
Secure Pages on Your Website
Once your SSL certificate has been successfully installed, you'll want to ensure that HTTPS is used on all the pages on your site that collect sensitive information. This can easily be done with the WordPress HTTPS plugin.
NOTE: If you follow this link you'll see that the plugin has not been updated in over two years. This is ok. The plugin is doing something very specific and has a narrow focus so updates aren't required as often as they would be for more complex plugins. Additionally, WordPress HTTPS is a recommendation, not a requirement. There are other WordPress HTTPS plugins available (https://wordpress.org/plugins/search.php?q=https). You can use any plugin that works to force HTTPS to be used on your site.
IMPORTANT: After activating the WordPress HTTPS plugin go to the settings screen and in the General Settings section make sure that the Force SSL Exclusively option is unchecked. When this is checked the WordPress HTTPS plugin accidentally modifies the URL on MemberMouse checkout forms to be unsecure. The result is that in some browsers customers will be shown a warning message when they attempt to submit the checkout form. To avoid this, just ensure that the Force SSL Exclusively option is unchecked as displayed below:

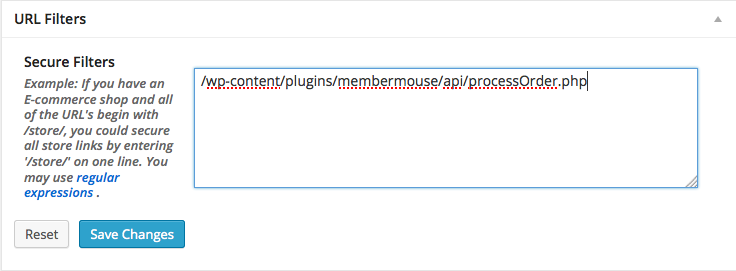
You will also want to add URL filters for the php process script that MemberMouse uses for transactions. These can also be added in the URL Filter section. You will want to add the following URLs:/wp-content/plugins/membermouse/api/processOrder.php
/wp-content/plugins/membermouse/scheduler/handler.php
And if you are using Social Login: /wp-content/plugins/membermouse/endpoints/auth.php
Next, go to each page that needs to be secure and check off Secure post in the HTTPS module. You'll want to do this for the MemberMouse Checkout and My Account core pages and any page you've included a MemberMouse checkout form on.

Ensure That Your Pages Are Fully Secure
Once you've installed a plugin to handle HTTPS and you've configured which pages should use HTTPS, you'll want to check and make sure there aren't any insecure items being loaded on your secure pages as this will typically cause the browser to show a warning to the user informing them that the page is not secure. In some browsers, like Chrome, they're more strict and will terminate rendering the page when an insecure item is encountered. You can use this tool to ensure that your pages are fully secure. If the report tells you that you have insecure items on your page, use this resource to fix the insecure items.