The Free Member Webform is an easy way to allow new members to sign up for a free membership without going through the checkout process. This form can be used anywhere that you can enter HTML code, for example, blogs, webpages, etc. Only free membership levels are available via this form, as paid memberships require the collection of additional payment-related information.
Follow the steps below to create a free member webform:
- In the MemberMouse menu, go to Webforms and then click on the Free Member Webform tab.
- Under the Membership Level heading, a drop down menu will display a list of all free membership levels currently created in your system. The membership selected here is the one that members will be signed up under when they fill out this form.

- Under the Form Fields heading, a list of fields to include in the webform will be displayed. Check the boxes next to the fields you would like will to be added to the form. The email field is the only required field. If the password field is not included in the form then a password will be randomly generated for new members. If you would like to add additional fields to the form, you can create custom fields. Read this article to learn more about creating custom fields.
- Click the
 button to generate the HTML for the form. The generated HTML code with appear in a box on the right.
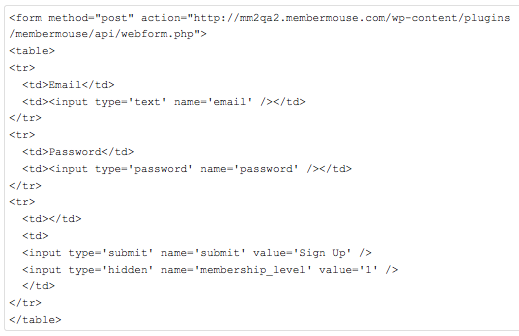
- Copy the generated HTML code for your form and paste it into any blog post, webpage, or any other place that allows HTML code. Keep in mind the HTML code that is generated is not styled and you may want to pass it along to a designer to add the appropriate styling.
When a user submits the form and has failed to fill out the email field in the form, or a field has been filled out with the incorrect information (i.e. the email is missing the @ sign), the user will be redirected to an error page on your site and displayed the appropriate error message. The user can then go back to the webform and enter the correct information.
Required Fields
The email field is required automatically and if there is a problem with the field, the user will be sent to an error page. If you would like to make any other field required, or display the email field error in a popup instead of referring to the error page, you can do so by adding the word 'required' to the input line for that field. For example, by default if a user does not enter a password, MemberMouse will randomly assign one to them that can be changed on first login. To remove this option you can set the field to required by changing the line for that field.:
<input type='password' name='password' />
changes to
<input type='password' name='password' required />